Troubleshooting tips (app FAQ)
ios simulator doesn't work
Sometimes the IOS emulator doesn't work when called from command line. If so, you can use Xcode to load the project:
/e-mission-phone/platforms/ios/emission.xcworkspace
and then run the project with IOS emulator. Make sure you use the most recent version of Xcode - older versions may not support some newer functionality.
android build fails with gradle errors
Some versions of Gradle create unnecessary files that may result in errors while building the app. Gradle 2.14.1 has proven to work without any issues.
If errors persist, make sure
/e-mission-phone/platforms/android/gradle/wrapper/gradle-wrapper.properties
looks like this:
distributionBase=GRADLE_USER_HOME
distributionPath=wrapper/dists
zipStoreBase=GRADLE_USER_HOME
zipStorePath=wrapper/dists
distributionUrl=https\://services.gradle.org/distributions/gradle-2.14.1-all.zip
Android platform SDK API levels
The Android platform requires API levels 18-21, make sure you have installed them in the SDK manager.
The e-mission logo shows up and then I get a white screen
This is the White Screen Of Death (WSOD) and typically indicates that you have an error preventing the scripts from loading. This not an e-mission specific issue - you can search for "white screen of death cordova" and techniques to resolve it. One issue to note is that, if you are running in XCode, the WSOD errors are not necessarily visible in the xcode error logs.
In order to see the WSOD errors, you simply need to connect a debugger to the emulator. For iOS, the debugger is built in to Safari (https://www.lifewire.com/how-to-enable-safari-develop-menu-2260894), for android, the debugger is built in to chrome (http://geeklearning.io/apache-cordova-and-remote-debugging-on-android/).
One issue is that the error may have occurred during startup, which means that you can only connect the debugger after the error is past. This is why I have judiciously sprinkled the startup code with alerts like the one below.
in www/js/app.js

.run(function($ionicPlatform, $rootScope, $http, Logger,
    CustomURLScheme, ReferralHandler, UpdateCheck) {
  console.log("Starting run");
  // alert("Starting run");
If you restore one of the alerts removing the comments - e.g.
// alert("Starting run"); ------> alert("Starting run");
the app will pause execution at that point. This gives you time to connect the debugger, and when you dismiss the alert, see the error.
Demo video
Syntax error
In order to demonstrate this technique, I manually introduced an error in one of the files by commenting out the closing parantheses
    function () {
        window.Logger.log(window.Logger.LEVEL_INFO,
            "CCI email cancel reported, seems to be an error on android");
        });
  };
// })
This video shows the resulting WSOD and how reloading the page in the debugger allowed us to find the line with the error.
Startup error
For this, I manually introduced a dependency error in the startup sequence. Note that I also reintroduced the alert to pause execution.
e-mission-phone shankari$ git diff www/js/app.js
diff --git a/www/js/app.js b/www/js/app.js
index bea9bb2..b3293ac 100644
--- a/www/js/app.js
+++ b/www/js/app.js
@@ -16,7 +16,10 @@ angular.module('emission', ['ionic','ionic.service.core', 'ionic.cloud',
 .run(function($ionicPlatform, $rootScope, $http, Logger,
     CustomURLScheme, ReferralHandler, UpdateCheck) {
   console.log("Starting run");
-  // alert("Starting run");
+  alert("Starting run");
+
+  var SURVEY_DONE_KEY = 'survey_done';
+  storage.remove(SURVEY_DONE_KEY);
   // BEGIN: Global listeners, no need to wait for the platform
   // TODO: Although the onLaunch call doesn't need to wait for the platform the
   // handlers do. Can we rely on the fact that the event is generated from
This video shows the alert popping up, connecting the debugger, the WSOD and then the error displayed in the debugger.
Debugging background sensing
It is really hard to debug background data collection, specially when: - the emulator does not support the sensors (such as the visit notification or the push notification on iOS), - the emulator is slow and working on the device is easiest (as in android), or - interacting with the application to see the results changes application state (brings it to the foreground)
Logging to the database ####
In e-mission, you can use the logging database to overcome these issues.
To log to the database, on android use
import edu.berkeley.eecs.emission.cordova.unifiedlogger.Log;
...
Log.d(this, TAG, "Read location "+loc+" from intent");
and on iOS, use
#import "LocalNotificationManager.h"

[LocalNotificationManager addNotification:[NSString stringWithFormat:@"reqConsent = %@, currConfig.approval_date = %@", reqConsent, currConfig.approval_date]];

[LocalNotificationManager addNotification:@"isConsented = YES"];
Accessing the log on your computer
These entries are saved into a log database on the phone. The log database can be emailed from the app (Profile -> Email log).
The resulting email has the sqlite loggerDB database as an attachment. The log can be opened in sqlite, which is included in the anaconda distribution required by the server (e-mission/e-mission-server#python-distribution)
$ sqlite3 /tmp/loggerDB
SQLite version 3.9.2 2015-11-02 18:31:45
Enter ".help" for usage hints.
sqlite> select * from sqlite_master;
table|android_metadata|android_metadata|3|CREATE TABLE android_metadata (locale TEXT)
table|logTable|logTable|4|CREATE TABLE logTable (ID INTEGER PRIMARY KEY NOT NULL, ts REAL, level TEXT, message TEXT)
sqlite> pragma table_info(logTable);
0|ID|INTEGER|1||1
1|ts|REAL|0||0
2|level|TEXT|0||0
3|message|TEXT|0||0
sqlite> select COUNT(*) from logTable;
299897
sqlite>
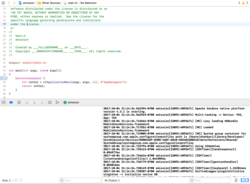
Reading the log on your computer
While you can directly use sqlite to manipulate the data, the sqlite shell is hard to work with, and timestamps are complicated for human brains. So I have a script to convert the database into text file with human-readable timestamps that you can grep through. The script is in the e-mission-phone repo (in the bin directory).
$ python bin/csv_export_add_date.py /tmp/loggerDB
exporting csv to /tmp/loggerDB.csv
adding dates to the dataframe
exporting csv with date to /tmp/loggerDB.withdate.log
You can't grep through the original database, but you can grep through the exported file, which also has human-readable timestamps.
$ grep "waiting_for_trip_start" /tmp/loggerDB
Binary file /tmp/loggerDB matches

$ grep "waiting_for_trip_start" /tmp/loggerDB.withdate.log | head -n 5
30,1480142454.51,2016-11-25 22:40:54.506000-07:53,TripDiaryStateMachineService : newState after handling action is local.state.waiting_for_trip_start
31,1480142454.56,2016-11-25 22:40:54.556000-07:53,TripDiaryStateMachineService : newState saved in prefManager is local.state.waiting_for_trip_start
531,1480177578.44,2016-11-26 08:26:18.436000-07:53,"TripDiaryStateMachineService : after reading from the prefs, the current state is local.state.waiting_for_trip_start"
535,1480177578.49,2016-11-26 08:26:18.491000-07:53,"TripDiaryStateMachineService : handleAction(local.state.waiting_for_trip_start, local.transition.exited_geofence) called"
1199,1480310370.63,2016-11-27 21:19:30.632000-07:53,"BuiltinUserCache : Considering transition 1.480177578443E9: {""currState"":""local.state.waiting_for_trip_start"",""transition"":""local.transition.exited_geofence""}"

$ grep "waiting_for_trip_start" /tmp/loggerDB.withdate.log | wc -l
   13076
Forcing FSM state
The data collection is controlled by a Finite State Machine (FSM) which essentially switches from moving to stationary states. Various functionality is tied to these states - for example, the data is only pushed after a trip end, and plugins may want only to turn on their sensors when the user is moving.
Trip states can be controlled by forcing transitions using Profile -> Developer Zone -> edit the state name (between "Nuke all buffers..." and "Check log". As you might expect, the "Start trip" transition starts the trip and the "End trip" transition ends it. Once you have forced the transition, the trip state should change. If it does not, make sure that your tracking is turned on (slider right below email) and networking is enabled.